How to colorize black-white-photos in photoshop
Lyudmila Pavlichenko is the most successful female sniper in the world history. 309+ Nazis killed, 39 sniper duels won. The best men of fascist Germany bit the dust in front of her.
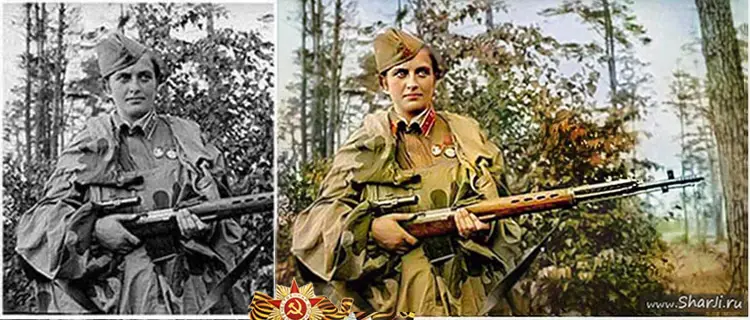
Photoshop tutorial: colorize an old black-and-white photo. Loading historical photo 1942. Let's start with restoration and retouching. We perform standard photo manipulations for a faded, damaged image: removal of grain, cracks, dust and scratches, adjust the brightness, contrast, etc. This must be done before adding color to your image. If you want to become a professional, use Adobe Photoshop as the main program tool and Adobe Lightroom as an auxiliary one.
Split an Image into Layers in Photoshop.
In a previous tutorial, we added color to Edward Curtis’s historical photo portrait from 1908 using simple color balance techniques. What should I do if the photo contains complex objects, such as vegetation, leaves, branches, and the like? And besides, they do not always have clear boundaries. Processing each bush or tree separately will take a lot of time. And the “selection” tools may not always correctly implement this task.
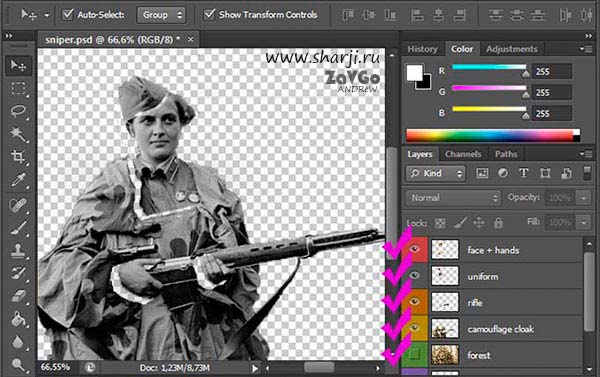
Split an Image into Layers, copy, paste the appropriate fragments. In our particular case it is:
-
Face, hands
-
Camouflage robe
-
Service shirt, side cap
-
Sniper rifle
-
Background: foliage, sky, grass, etc.
Add color
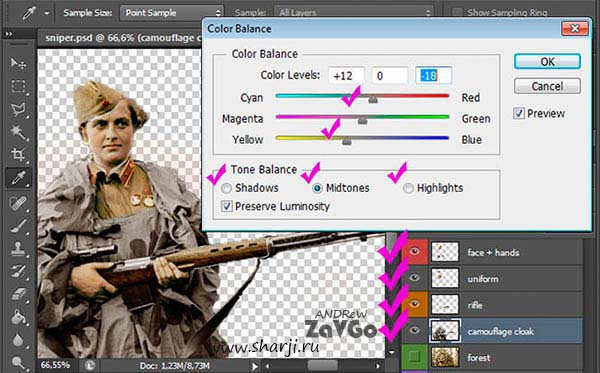
Colorize all the layers except the background. We use the Color BalancetoolCtrl + B, Hue/Saturation Vibrance, Ctrl + U, + Y. We will not describe this process in more details; it is considered thoroughly in the previous tutorial. After completing the manipulation with the sniper herself, we go to the background.
We ‘split’ the forest and the sky, in this case, lights and shadows. Image Adjustments Selective Color. Approximate tab options should be as follows:
«White» + 100% blue, -100% yellow
«Gray» -30% blue + 50% yellow
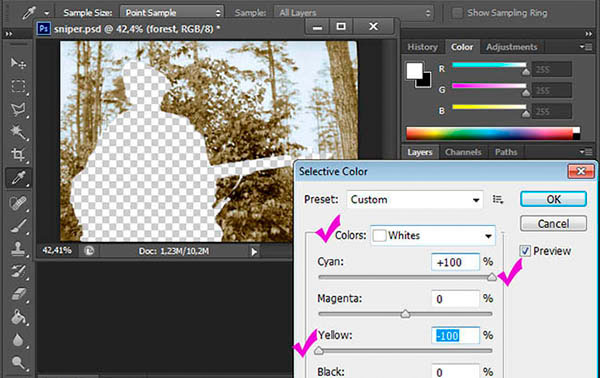

This procedure can be repeated several times, with different settings, until the desired result is obtained. Also, add or fade colors. There is no exact rule, it all depends on your artistic taste and sense of beauty. Here, only, the basic techniques and directions of work are shown. Ultimately, the trees should have yellow-green hues, the sky should be blue.
Color correction, final processing
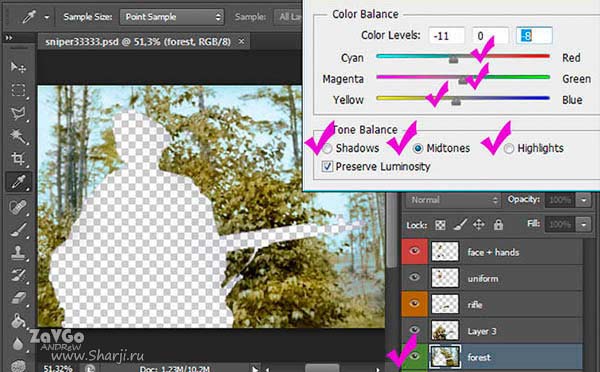
Perform the Color Balance actions in three Tone Balance modes. Preserve Luminosity:
-
Highlights
-
Shadows
-
Midtones
After execution of all the actions, our picture still looks mechanical and not natural as a black-and-white film. Several easy actions give it a variety of natural look.
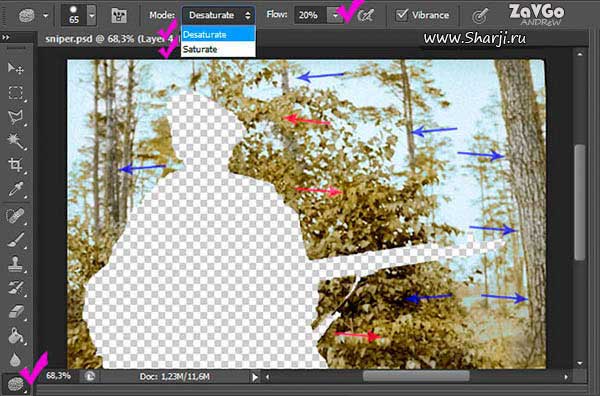
Working tool will be theSponge (O). Foliage, Sky — saturate. Trunks of trees — desaturate. Next, create a new layer in the Overlap mode.
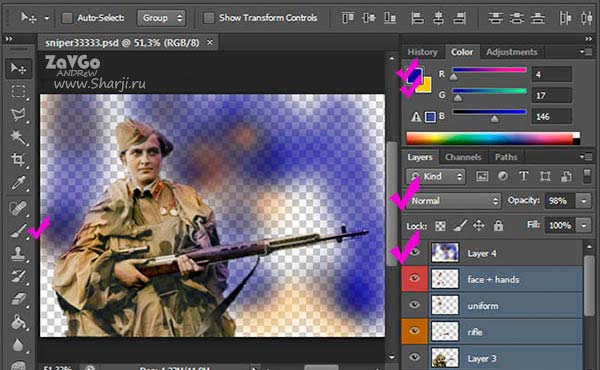
Selectively paint the picture with a brush (B) of minimum hardness and transparency from 10% to 50%. Classic colors: blue, yellow, orange. A layer in the «Normal» blend modeloks somewhat like this.
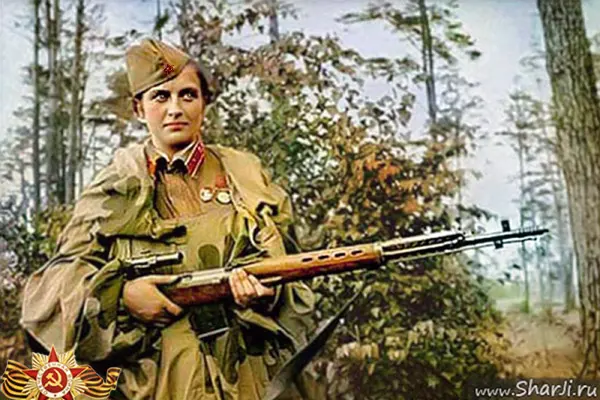
Merge all the layers, if necessary, correct he photograph once again. The final result is obtained in 35-50 minutes.
Bonus
Trailer. "Battle for Sevastopol"

