Tutorial. Restoration of old photos. Coloring black-and-white-photographs
Do you want to make your old black-and-white photos color?
I will show you the way to do so in this tutorial, through the example of a very old and fadedphotograph that is more than a century old. By the way, the steps to do are really simple, so let's get started.
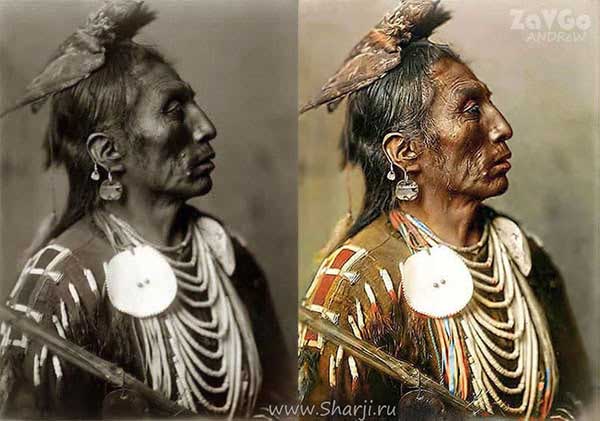
Medicine Crow's portraits by E. Curtis, 1908
Restoration old photos
Open the black-and-white photo that you want to color. If you start processing a very old photo as I do, then you must restore it in advance as I have done. Standard photo editing, retouching Photoshop includes:
-
Removing scratches, cracks, grain.
-
Work with sharpness, increase and decrease it.
-
Recover the missing fragments.
-
Brightness, contrast.
-
Color correction, color balance.
-
Depending on the shot at this stag
Regarding the picture itself, you can use Adobe Photoshop or Adobe Lightroom now, depending on your skills..
Editing layers in Photoshop Elements
1.The selection of individual elements and layer splitting.
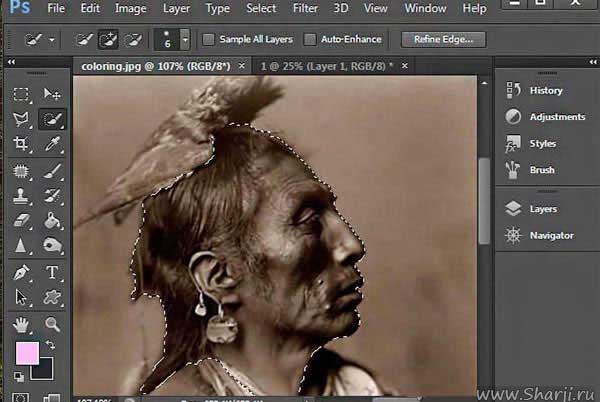
Let's start with the head. In our case, this is the face and hair. Computer editing and artistic retouching is not an exact science, there is no universal recipe that is suitable for everything. We only reveal some secrets, coloring old photos. The final result will to a large extent depend on your skills, imagination and taste.
We use various tools. Magic Wand Tool (W). Outline the head quickly, so that the hair and some other details do not have sharp edges: right-click, shading 3-5px. Copy, paste on a new layer: “Head”.
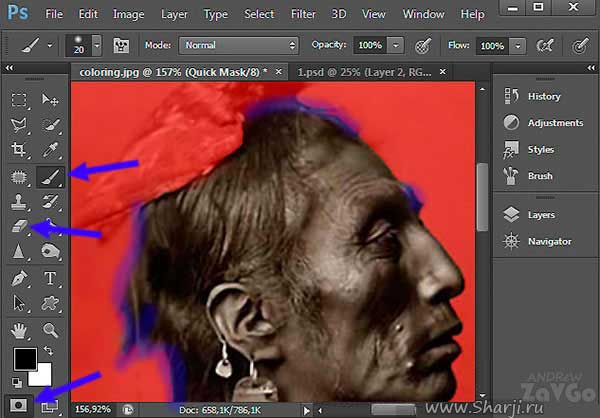
More complicated way, requiring more time and skills… Quick Mask (Q). Adjust with a brush and eraser. If necessary, you can get smooth "fuzzy" edges. Brush (B), Eraser Tool (E)
Adding colors to ablack-and-white photograph
2. Shift Hue/Saturation sliders. Select Enhance > Adjust Color > Adjust Hue/Saturation. (Shadows, Midtones, Highlights). The following parameters are set for this “face”. There are also additional Shadows and Highlights checkboxes.
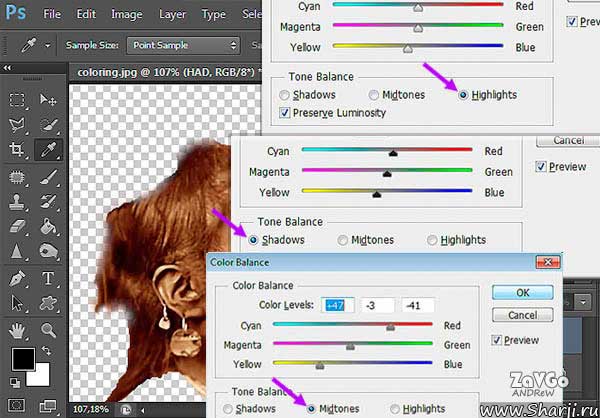
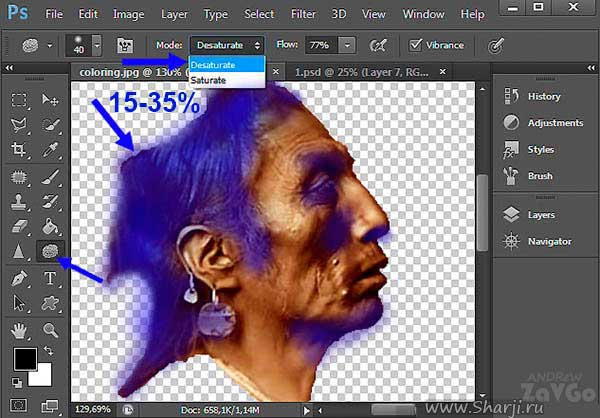
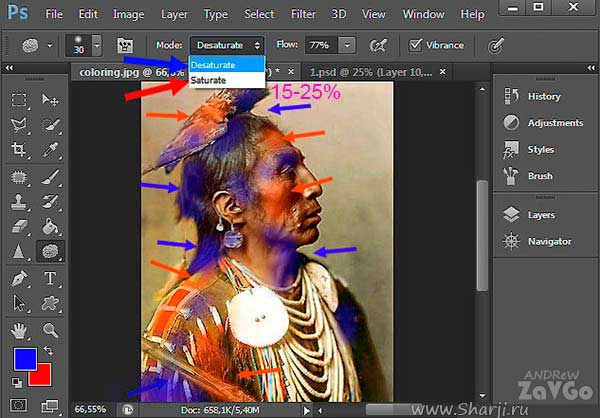
3. Enhance > Adjust Color > Adjust Hue/Saturation. We make small changes to the "colorfulness" of hair, eyebrows and other elements. Sponge Tool (O) Desaturate 7-35%. This picture fragment is highlighted in blue. These simple but time-consuming manipulations give a certain naturalness. What ultimately distinguishes manual editing from automatic
.
Fine Art retouching
4. Bring variety to the "mechanical palette". Add various shades, halftones to the “Head”. Here we use red and yellow. A simple option: brush transparency 3-5% or work in the "Overlap" mode, the transparency of approximately 20-70%.
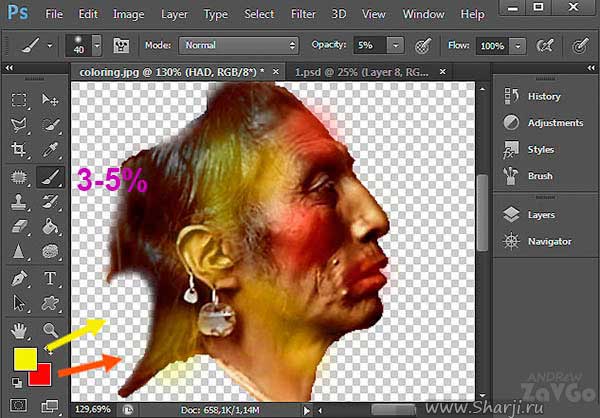
Artistic processing of photos, a more complex way:
-
Create a new layer SHIFT + CTRL + L
-
Layer Mode Overlay
-
Click the right button - Create a clippingmask
-
Transparency 25-100%
There are no fixed numbers, each picture is individual, the data is approximate and may vary depending on the desired result.
Adding color to a black-and-white image
5. We carry out the above points 1 to 4 for the remaining elements: clothing, headgear, background and so on. For expressiveness and naturalness, three primary colors are normally used: red, blue and orangee.
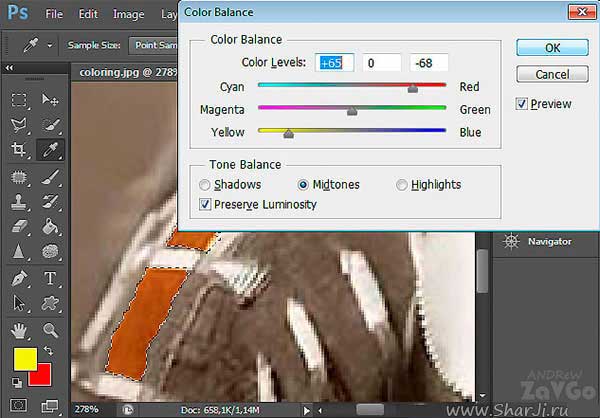
After merging all the layers, we recommend that you selectively walk through the entire reproduction once more. Sponge Tool (O) 15-40%. Blue - Desaturate. Red - Saturate.
You can use Filter>Sharpen or Imagenomic Portraiture. This takes approximately 40-60 minutes.
video tutorial

